Design. Create. Decorate.

Design. Create. Decorate.

Saturday, February 27, 2016

Transitioning the Mantel to Early Spring!

Hello there, welcome to Quince Cottage!
We love every season here in North Carolina and we try to savor each for its unique natural beauty. We do this not only through daily doggy walks, but in our decor as well.
Having said that, we're getting a teensy bit tired of the dull browns and grays of late winter. So when we received a beautiful gift from a dear friend, that was all the excuse we needed to tweak our mantel display with a sneak peek of spring.
If you didn't visit us during the winter, here is our holiday mantel.

© Rhiann Wynn-Nolet
And here is our post-holiday-but-still-winter mantel.

© Rhiann Wynn-Nolet
And now, here's a view of the right side of our mantel.

© Rhiann Wynn-Nolet
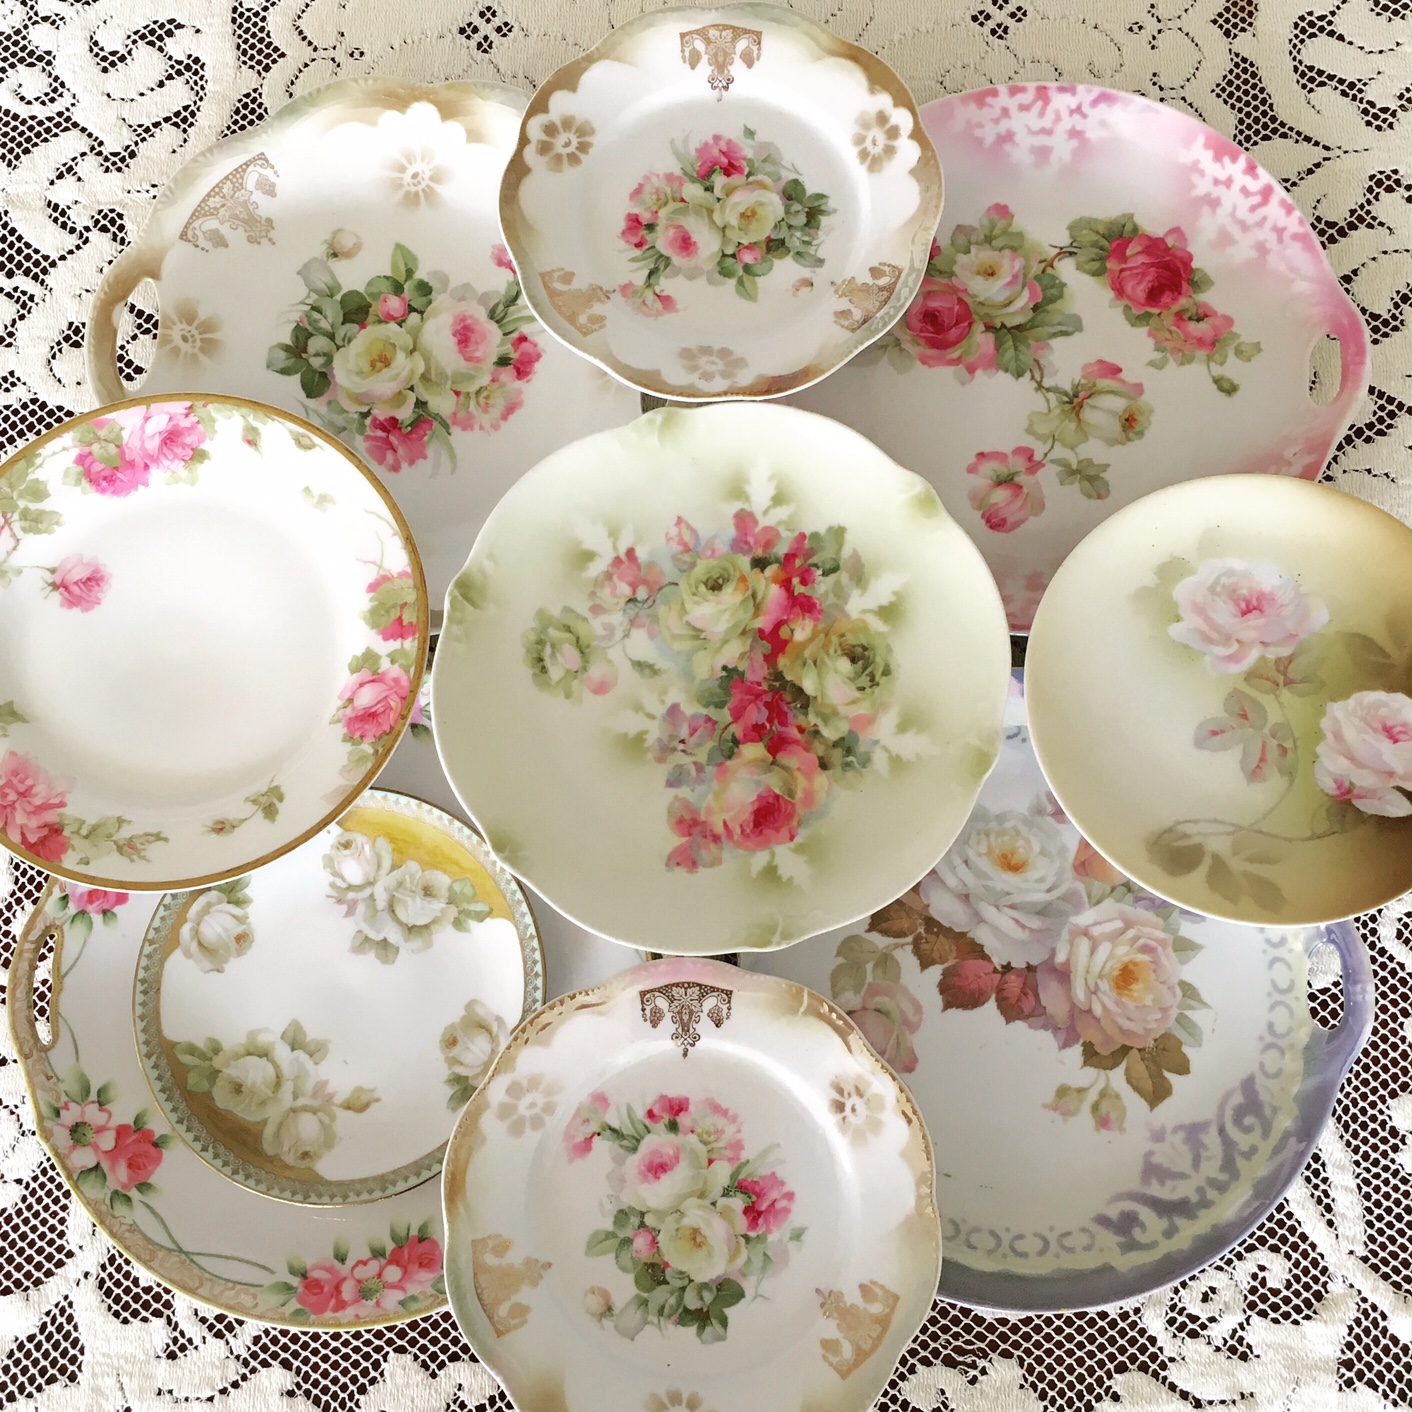
See those rose plates? They were in storage until Rhiann got them out for an IG post about collections for the MagpieMonday hashtag she cohosts.

© Rhiann Wynn-Nolet
Aren't they pretty?
Here's the left side of the mantel. That gorgeous pink hobnail covered compote is the gift we received from our friend Juls. She's an extremely creative and obviously generous person, with fabulous taste. Here's a link to her Instagram , she is definitely one to follow.

© Rhiann Wynn-Nolet
You might have spied our recent shadowbox project up above as well. Click here for the DIY if you're curious. And now for the whole shebang... We'd originally planned to take the crystal garland down along with the other winter decor, but it's just so pretty we're leaving it up for now.

© Rhiann Wynn-Nolet
Are you decorating for spring yet? What are your favorite spring themes?
We mentioned #MagpieMonday earlier. Follow us on IG here for more about that.

© Rhiann Wynn-Nolet
Now it wouldn't be right to leave you with no doggy pictures, so here here you go! Buster in front, Daisy being camera-shy.

Buster & Daisy © Rhiann Wynn-Nolet

Quince Cottage Style is #agrarianchic - a mix of old and new, rustic and opulent.
Our goal is to make our new subdivision house look inviting, beautiful, 
and as though it wasn't born yesterday!

Saturday, February 20, 2016

DIY Coffee Filter Wreath

Welcome to Quince Cottage!
If you're on Pinterest, no doubt you've seen a coffee filter wreath, and maybe even made one yourself. But if you haven't, and are feeling crafty on a small scale, here's a quick how-to.
You will need: a wreath form, 2 packages of paper coffee filters (8-12 cup size), a hot glue gun, a good sized artist's paint brush or a Sharpie. You can also use a piece of twine if you want to create a way to hang the wreath easily after completing it. This wreath is easy to make and quite inexpensive (about $10).

© Rhiann Wynn-Nolet
My advice is to leave the straw wreath wrapped in plastic, less mess and better adhesion. You could use a foam wreath form if you prefer. I used a length of twine and tied it around the straw form in two places so that I'd have an easy method for hanging this sucker just about anywhere.

© Rhiann Wynn-Nolet
Load and heat your glue gun. Put your capped Sharpie or the non-working end of the paint brush in the center of the filter and pull the sides up around it like a closed umbrella. Dab glue on the filter where you've created a small area for contact with the wreath form. Using the marker or paintbrush allows you to poke the filter into place without getting hot glue burns (well, okay, I did burn myself twice, but it had nothing to do with using the helper paint brush).

Start with the inner part of the wreath (around the central hole). Work in ever-expanding concentric rings from that first inner circle. In retrospect I think I packed the filters a little too densely. You can easily leave an inch between filter contact points and your wreath will turn out great. I fully intended to take a photo "during", but my glue gun had other ideas and was churning out molten glue so fast I never got to take a break.

Once you're finished, you can trim off any filter edges that protrude past where they should. Here is the finished product adorning the rusty windmill head on the planked wall in our dining room. I think it makes a nice, fresh-looking warm weather wreath, but it's also quite suitable for a white winter holiday scheme. By the way, if you're interested in the planked wall DIY, click here.

© Rhiann Wynn-Nolet
We hope you've enjoyed this quick and easy project. Buster and Daisy aren't all that interested in artsy-craftsy pastimes...

Naptime for Daisy and Buster © Rhiann Wynn-Nolet

Remember Mondays are #MagpieMonday on Instagram, where you get to show off your collections of decor items. Follow us here to learn more.

© Rhiann Wynn-Nolet

Quince Cottage Style mixes old and new, rustic and opulent.
Our goal is to make our new subdivision house look inviting, beautiful, 
and as though it wasn't born yesterday!

Thursday, February 11, 2016

DIY Old Clock Shadowbox

Welcome to Quince Cottage!
Today we have a small-scale DIY project to share.
Rhiann blames Pinterest for this one. All those pretty pictures of fascinating, artsy shadowboxes made from Altoid's tins made her want to make one for herself, but in a somewhat larger size.
We found an old clock at a thrift shop. It wasn't working, so no need for remorse about disemboweling it. Besides, we plan to upcycle all the parts into various other projects.

© Rhiann Wynn-Nolet
Once the innards were out, it was time to scrape off what remained of the decal ornamentation on the glass front.
© Rhiann Wynn-Nolet
She painted the inside a light blue to blend in with the sky image she found on the interwebs. After copy/pasting it into a Word doc, she printed it out, cut it to fit and glued it in. She used a different image, this time of mountains and hills, and repeated the process for the lower section.
We found a ceramic bird magnet at a little shop. A blob of hot glue and it's forever flying high!
A real twig, broken to size, simulates tree branches. A dollop of hot glue holds the stick in place. There's no need to over-worry the matter of scale. In other words, the ingredients all make sense, and that's sufficient in this kind of piece. Some moss from the hobby shop lines the bottom of the clock. (again hot glue here and there).
Finally the crowning glory--a real bird's nest that Rhiann found blown out of the trees after a storm. Look at that pretty blue thread running through it! That bird had a decorator's eye for sure.

Nest © Rhiann Wynn-Nolet
This is what it looks like close up, with the door open.

© Rhiann Wynn-Nolet
Here's the finished creation.

Shadowbox © Rhiann Wynn-Nolet

This was a fun project that didn't take very much time at all. Maybe we'll do another shadowbox soon!
If you're on Instagram follow us here and show your decor collections for #MagpieMonday!

© Rhiann Wynn-Nolet
This week feels like winter here in North Carolina, but last week was warm enough to spend a little time relaxing on our back porch. Here's Daisy basking in the sun. What's the weather like where you are? Tell us in comments, we love to hear from our followers!

Daisy © Rhiann Wynn-Nolet


Quince Cottage Style mixes old and new, rustic and opulent.
Our goal is to make our new subdivision house look inviting, beautiful, 
and as though it wasn't born yesterday!


Saturday, January 30, 2016

Recipe - Low Carb Yummy Crustless Quiche

Welcome to Quince Cottage!
If you're watching your carbs, or if you just aren't a big fan of pie crust, then this quiche is for you! Quiches are ideal for using up little bits of this and that which might otherwise go to waste (small hunks of cheese, half an onion, cooked vegetables, etc.) They're perfect for brunch, lunch or light dinners. And LEFTOVERS, served hot or cold.

RECIPE:

Ingredients
8 oz. fresh mushrooms, thinly sliced
Salt
Black pepper
1 bag baby spinach
1/4 C sun-dried tomatoes (packed in oil), pat dry, chop small
4 oz. crumbled feta cheese
1/4 C chopped scallions
5 eggs
3/4 C milk
1/4 C grated Parmesan
4-6 oz. shredded Swiss cheese (depending on how cheesy you like it), divided 1/3, 2/3

Directions
1. Spray large skillet with cooking spray or rub with oil. Over medium-high heat, saute mushrooms. Cook until no water remains on bottom of pan (5-7 minutes). Add spinach and sun-dried tomatoes. Season with salt and pepper. Cook until spinach is wilted
2. Spray 9" pie pan with cooking spray. Spread spinach mixture in pan. Place  1/3 Swiss cheese, and feta on top.
3. In medium bowl, whisk eggs until smooth. Add milk and Parmesan. Whisk to combine. Pour over mushrooms and feta. Sprinkle remaining Swiss cheese on top.
4. Bake at 350 degrees for 45-60 minutes, until golden brown on top and center is set. Let cool slightly before slicing.
Serves 6
Variations: substitute liquid egg whites for some or all of the eggs, use different cheeses, add bacon, ham, sausage, use kale instead of spinach, add caramelized onions, roasted red peppers, black olives, etc.
Crustless Quiche © Rhiann Wynn-Nolet
Served Quiche © Rhiann Wynn-Nolet
A piece of quiche "might" have made its way into a dog's bowl once. They gave it a good review. Hope you like it too!

Daisy & Buster © Rhiann Wynn-Nolet
Also, don't forget to join us on Instagram! If you love collecting things (walking sticks, milk glass, vintage cameras or anything else you use as decor), then our cohosts and I want to see what you've got every Monday! See our #Magpie Monday posts for details.

© Rhiann Wynn-Nolet

Quince Cottage style is where rustic and sparkly rub shoulders. 
Think gilded mirror against a plank wall, and you'll know what we mean. 
We prefer our opulence a little beat up and our recipes 
GOOF-PROOF!

Sunday, January 17, 2016

DIY - Rustic Cabinet ReDo

Welcome to Quince Cottage!
As you may know, we like to go bargain-hunting. Thrifting, junkin', antiquing, call it whatever you want. Finding a diamond in the rough, or "buried treasure" is always exciting. Earlier we did a post about finding a shabby dresser and making it look all pretty again. Here is that post, if you're curious.
At the very same shop in Raleigh, we found a rustic cabinet. Now, please understand we weren't in the market for a cabinet of any kind. Our house isn't all that big, so impulse buys of large objects don't happen very often. To make it clear, the inside of our garage has never seen a car because storage is an issue here. But this cabinet had the "it" factor. It was clearly crafted by someone who didn't make furniture for a living, yet the curved detailing along the skirt and the walnut inset panels indicated that the maker was trying. Trying really hard to make this piece special. At least in the front - the back not so much. The other compelling feature was its price.

At the shop © Rhiann Wynn-Nolet
Here's a better picture of that fancy (in a naive way) skirt at the bottom.

© Rhiann Wynn-Nolet

After a bit of haggling, we became its new owners. The dear old thing was delivered to our home the following week.
Inside was a shelf and below it, a board with some hooks attached. Ron removed all that, along with the doors. He then gave everything a much-needed deep cleaning.

Removed the doors © Rhiann Wynn-Nolet
Did you notice in that photo above, taken in the garage aka workshop, that there are no cars to be seen? Told you.
We decided to paint the interior for contrast, and to make a more pleasing background to display whatever we ended up putting on the shelves. We had some leftover Valspar latex paint from an office redo a few years ago. The color is Blue Arrow. It's a perfect shade, not too "baby", just a little "dirty" (meaning it has some earthy warmth to it). This chip is a bit darker than the color is in real life.
Also because the cabinet's new purpose was to display pretty things, this old beasty needed some sturdy shelves. We bought pine boards from Lowe's and Ron cut them to the desired length. Using some leftover molding strips we had lying around, he created supports by cutting the strips to fit, then gluing and screwing them to the cabinet interior. These do a nice job while maintaining a low visual profile.

Painted interior © Rhiann Wynn-Nolet
Here's a close up of the support strips.

Support strips © Rhiann Wynn-Nolet

After the painting, a coat of clear polyurethane was applied to the interior surfaces only, including the shelves
Ron waxed the au naturel wood exterior with paste wax. This provides protection and gives a lovely, warm glow.

© Rhiann Wynn-Nolet
We installed new knobs, but chose a style that looks antique. They're real glass.

© Rhiann Wynn-Nolet

Then we added some gimp along the edge of the shelves for a finished look. We got a good deal on some closeout trim at a fabric outlet. We took care to choose one that looked vintage and had a bit of blue in it. Hot glue worked just fine to adhere it to the shelf edges. We only burned ourselves once or twice.

© Rhiann Wynn-Nolet
Now the fun part! Styling!
You might have noticed this cabinet in our post about Christmas decor. If not here you go - we displayed our mercury glass collection, our white pitchers, and created a Winter Wonderland for our Snowbabies!

© Rhiann Wynn-Nolet

Fairy lights and white felt on stacked boxes make it pretty effective. Here's a closer look...

© Rhiann Wynn-Nolet

Now that the holidays are over, but it's still winter, the Snowbabies are hibernating. We've gone all white for a fresh, simple look with white ceramic pitchers and milk glass. There are some pillows and throws on the bottom shelf to contribute warm, soft textural elements.

© Rhiann Wynn-Nolet
Here's a photo of the cabinet in its new setting. Daisy dog for scale...

© Rhiann Wynn-Nolet
Now of course, it wouldn't be fair to deny you a cute Irish Jack Russell picture, right? Daisy looks suspicious, doesn't she?

Buster & Daisy © Rhiann Wynn-Nolet
Don't forget, if you're on Instagram, please follow us here and join us for #MagpieMonday ! We want to see your decor collections! There are four co-hosts and we each choose our weekly favorite to feature in our gallery and in the following week's meme.

© Rhiann Wynn-Nolet

Quince Cottage Style mixes old and new, rustic and opulent.
Our goal is to make our new subdivision house look inviting, beautiful, 
and as though it wasn't born yesterday!

Friday, January 8, 2016

DIY - Styling the House After the Holidays Part II

Welcome to Quince Cottage!
Perhaps you visited last week, when we showed how to style a simple, elegant mantel for winter. If not, you can go here to have a look.
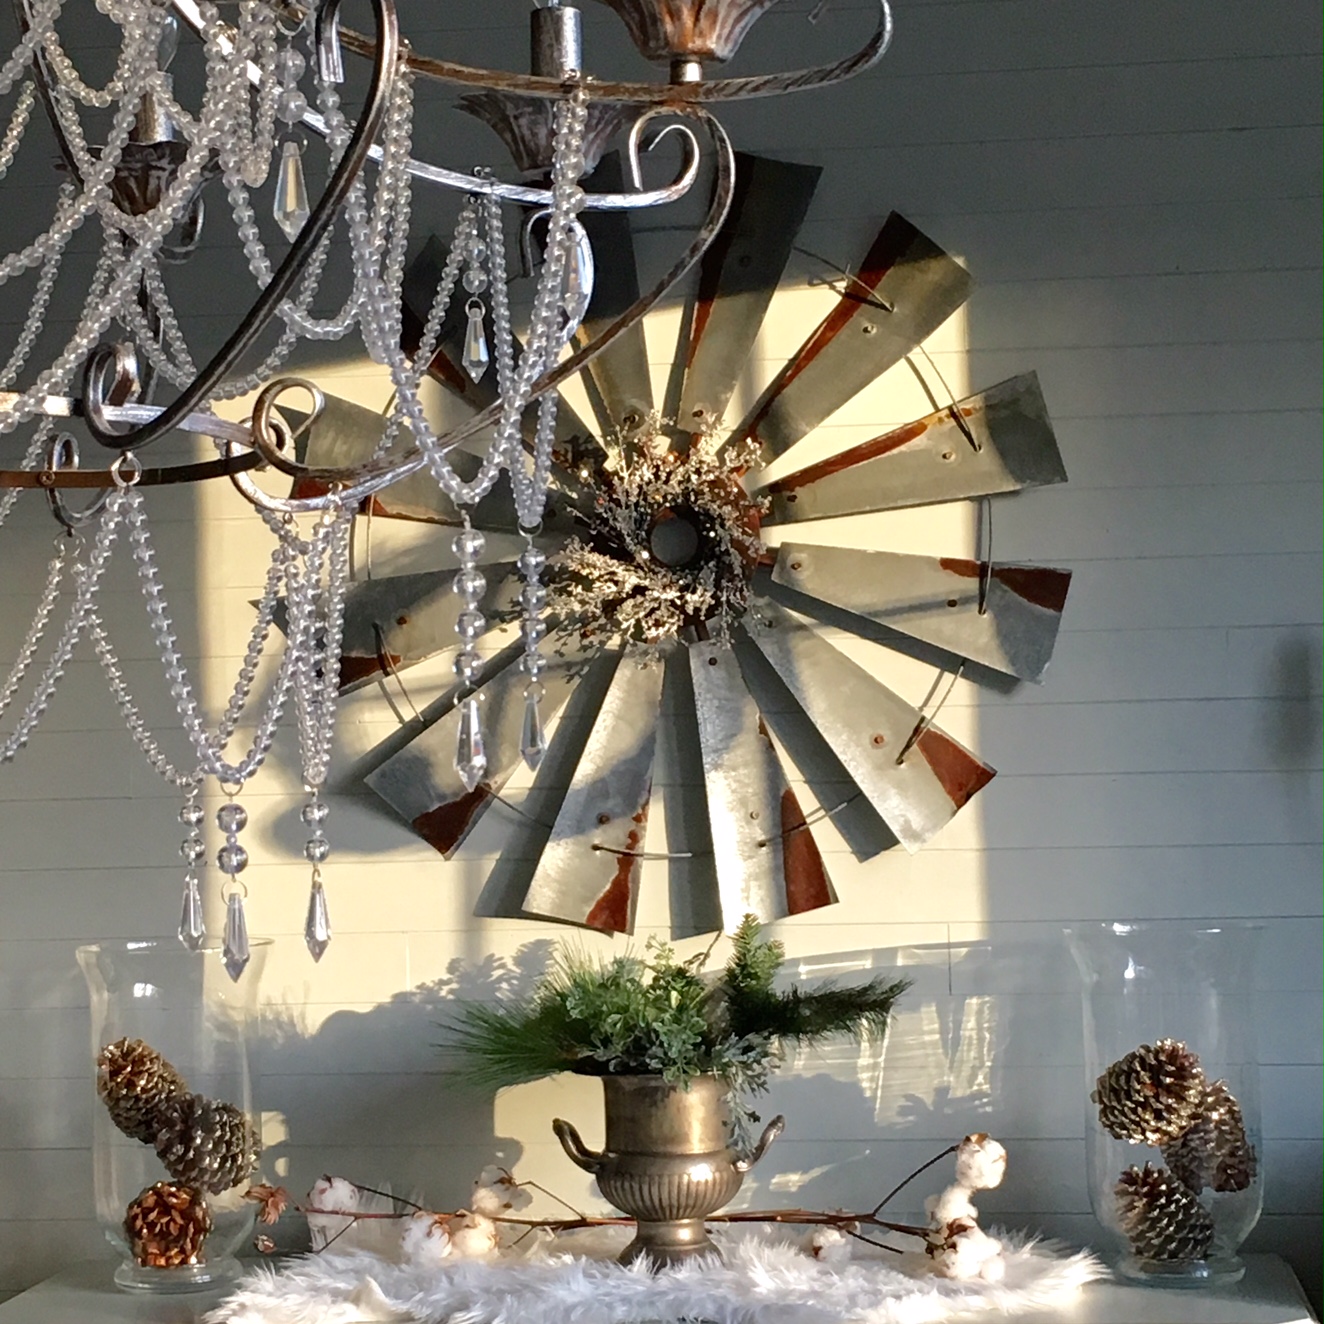
Our first re-do of the dining room buffet looked like this. Those glittery pine cones were half price at TJMaxx and they certainly work for generic winter as well as holiday. In the second photo below, we mixed them with some "au naturel" ones in those large glass hurricanes. The faux fur throw is also from TJMaxx and creates a pretty, snowy look. The throw, the real cotton stems, and the faux greenery add soft texture to an otherwise "hard" vignette. We added a sparkly little crystal wreath to our windmill head too.

© Rhiann Wynn-Nolet

But then we bought a cake stand at HomeGoods and that led to some alternative design inspiration.

© Rhiann Wynn-Nolet
Fairy lights make everything special, don't they? We always look for the ones that have a timer - that way we never have to think about turning them on or off. These lights are a snowflake design.

© Rhiann Wynn-Nolet
Here's our winter dining table. Sorry, didn't have time to do place settings!

© Rhiann Wynn-Nolet
A few days later Rhiann found a great deal on a wood slab at Marshall's and set up a little centerpiece to replace the milk glass compotes. Yes, we know, more pine cones, but aren't they great? These were free! The mercury glass votives cost a couple of bucks a piece at Michael's and we put battery-operated candles in them.

© Rhiann Wynn-Nolet
In our living room cabinet, we kept the mercury glass display "as is".

© Rhiann Wynn-Nolet
In the foyer, we removed the bits of Christmas (glittery deer, red berries, ornaments) and just kept it simple with milk glass and bits of Nature.

© Rhiann Wynn-Nolet
Winter is the perfect season for napping, don't you think?

Daisy and Buster © Rhiann Wynn-Nolet

We also want to let you know about a fun Instagram hashtag we started this past Monday. It's called #MagpieMonday and the idea is to share a photo of whatever you like to collect and display in your home. Each co-host picks a favorite to feature on their feeds. Follow us on Instagram here to learn more and see which IGer's collection was our pick this week! Also, we've just passed the 2k follower mark and we're pretty excited about that too.

© Rhiann Wynn-Nolet

Quince Cottage Style mixes old and new, rustic and opulent.
Our goal is to make our new subdivision house look inviting, beautiful, 
and as though it wasn't born yesterday!

Friday, January 1, 2016

DIY Restyling the Mantel Post-Holiday

Hello, and welcome to Quince Cottage!

First of all, we'd like to wish you a 2016 full of love, peace, and inspiration!

© Rhiann Wynn-Nolet
As we see it, there are two ways to view the post-holiday winter season. 
1. Now that all the excitement is over, winter is dull and colorless (depending on where you live of course).
2. Now that all the excitement is over, winter is a peaceful time for reflection and simplification.
Let's go with 2, shall we?
Now, as you may already know, Rhiann's favorite part of the home to style is the mantel, so it makes sense that's where she headed first, once the holidays were over.
If you weren't around for Christmas, here's what the mantel looked like then.

© Rhiann Wynn-Nolet

Now, with the goals of simplifying and honoring the bare, frosty, beauty of winter, she started with one of our Chinese porcelain vases, which is icy blue, gray, and white. An IG potter friend let us know this is a crystalline glaze and actual crystals form during an extra slow cooling cycle or a long hold time.

© Rhiann Wynn-Nolet
Rhiann filled the vase with branches, some of which already had little faux ice crystals stuck to them. The others were the branches we painted to look like birch and stuck in our Christmas tree. The real branches have glass icicles wired to them.

© Rhiann Wynn-Nolet

She strung a garland of crystal prisms across the mantel. Finally she worked on the right side, using her favorite empty Victorian frame and a small watercolor we bought long ago in New England. It's a snow scene at sunset and reminds us of the years we lived in Massachusetts, New Hampshire, and Maine. We miss the beauty of snow, but not the shoveling, or the bad driving! Finally she tucked in a sprig of faux juniper and added a real jumbo pine cone. We bought a bunch of these pine cones in an antique store and they had a good time laughing at us for buying things they picked up in their yards. They were only fifty cents a piece and unfortunately we don't have sturdy, supersized pine cones anywhere near us, so...

© Rhiann Wynn-Nolet
That shot above gives you a nice clear look at the great job Ron did creating an old, distressed finish on our brand new mantel. If you're curious, click here for the DIY.
Now here's a photo of the whole thing.

© Rhiann Wynn-Nolet

We'll be sharing other areas of the house that have transitioned from holiday to winter season in an upcoming post. Tell us what part of your home you like restyling seasonally in Comments. We'd love to hear from you!
And of course, it wouldn't be a Quince Cottage post without a cute doggy pic. This was how Daisy and Buster spent most of New Year's Eve. Party animals...

© Rhiann Wynn-Nolet
We'll leave you with a beautiful North Carolina sunset to start the year off right. The beauty of Nature is just one of the many things we hope you'll enjoy in 2016.

© Rhiann Wynn-Nolet

Quince Cottage Style mixes old and new, rustic and opulent.
Our goal is to make our new subdivision house look inviting, beautiful, 
and as though it wasn't born yesterday!