Design. Create. Decorate.

Design. Create. Decorate.
Showing posts with label Michael's. Show all posts

Friday, March 18, 2016

DIY--Memory Box

Welcome to Quince Cottage!
Today we have another shadowbox DIY to share.
When his dad died a little while ago, Ron wanted to find a way to remember him that went beyond a simple framed photo. Along with Ray's golf clubs, which might or might not ever see service, Ron inherited a small collection of personal items: a tie, some photos, a couple of rollerskating medals, etc.
To keep these special mementos safe but visible, Ron created a shadowbox. The box itself he got at Michael's. Ron's dad worked at a shoe factory in Manchester, New Hampshire when he was very young, so we found a wooden shoe form at a local antique store. It's a tiny, child-sized one, just right for this purpose. A small piece of leather behind the mold reinforces the shoe-making idea and highlights the shape of the mold.

© Rhiann Wynn-Nolet
As you can see above, Ray was an early fan of the selfie! He also enjoyed skiing in New Hampshire's spectacular White Mountains. Some of Ron's funniest stories involve family ski trips.
Ray's wristwatch is in the photo below. Despite the watch, Ray was chronically late (this might be a genetic thing, although Ron's never actually left either of our children standing lonely on a street corner waiting to be picked up). While punctuality wasn't a strong suit, Ron credits his dad with instilling an appreciation of Nature, and that's why there's a bird feather.
As you may already have noted, Ron used a variety of objects in this shadowbox, some two-dimensional and some three-dimensional. Some are black/white, others have color. There's a mix of "hard" materials (metals and wood) and softer ones (fabric and the feather). All these contrasts, along with a variety of shapes, help to give the composition visual interest.

© Rhiann Wynn-Nolet
Ray met his future wife, Irene, when he was very young. In fact he was only sixteen when they got married! (She was a little bit older). They enjoyed rollerskating together and if the medals indicate anything, apparently they were pretty good at it!

© Rhiann Wynn-Nolet

Ron included one of Ray's ties, and a photo of him wearing that very same tie.

© Rhiann Wynn-NOlet
Unfulfilled by his job making shoes, Ray started his own business building houses. He became well known in the area for his fine reproduction Colonials. Ron spent a few summers helping out and learning about house design and construction. With that in mind, Ron papered the back of the shadowbox with woodgrain paper and included both a compass (which had been Ray's) and a rusty old nail (near the feather).

© Rhiann Wynn-Nolet
I apologize for the distracting reflections in the glass, try as I might I couldn't find an angle where those were not an issue. SO frustrating! But I digress...
If you're assembling a shadowbox, play around with the placement of objects before fixing any of them into permanent position. The photos in this box are straight up and down, but if you'll notice, some of the other items (tie, feather, nail) are placed at angles. Again, this is a matter of personal taste, but the idea was to make the composition less static and more dynamic - moving the viewer's gaze around. Use whatever adhesive makes sense given the materials you're using (hot glue, regular glue, etc.).
We'll close up this DIY with a picture of Ray, looking very French-Canadian (he was born in Quebec). It's nice to have these tangible reminders of a loved one and their life story, both for Ron and for our children, who knew Pepere only as an elderly man.

© Rhiann Wynn-Nolet
Tell us what you think, have you made a shadowbox before? What was its purpose? Strictly decorative or something more?
Oh, wait...we can't say farewell without a cute Irish Jack Russell pic! This was taken a week or so ago on a walk by the Neuse River. As you can see Buster (aka Pork Chop) is keenly focused on the treat in my hand. Daisy is scanning the woods beyond, ever hopeful of finding a squirrel. Preferably a fat, elderly one, with a limp and poor eyesight.

Buster & Daisy © Rhiann Wynn-Nolet
And one more thing! Don't forget to join us here on Instagram for our #MagpieMonday fun. If you collect decorative items of any kind, you're going to love it!

© Rhiann Wynn-Nolet

Quince Cottage Style is #agrarianchic - a mix of old and new, rustic and opulent.
Our goal is to make our new subdivision house look inviting, beautiful, 
and as though it wasn't born yesterday!

Friday, January 8, 2016

DIY - Styling the House After the Holidays Part II

Welcome to Quince Cottage!
Perhaps you visited last week, when we showed how to style a simple, elegant mantel for winter. If not, you can go here to have a look.
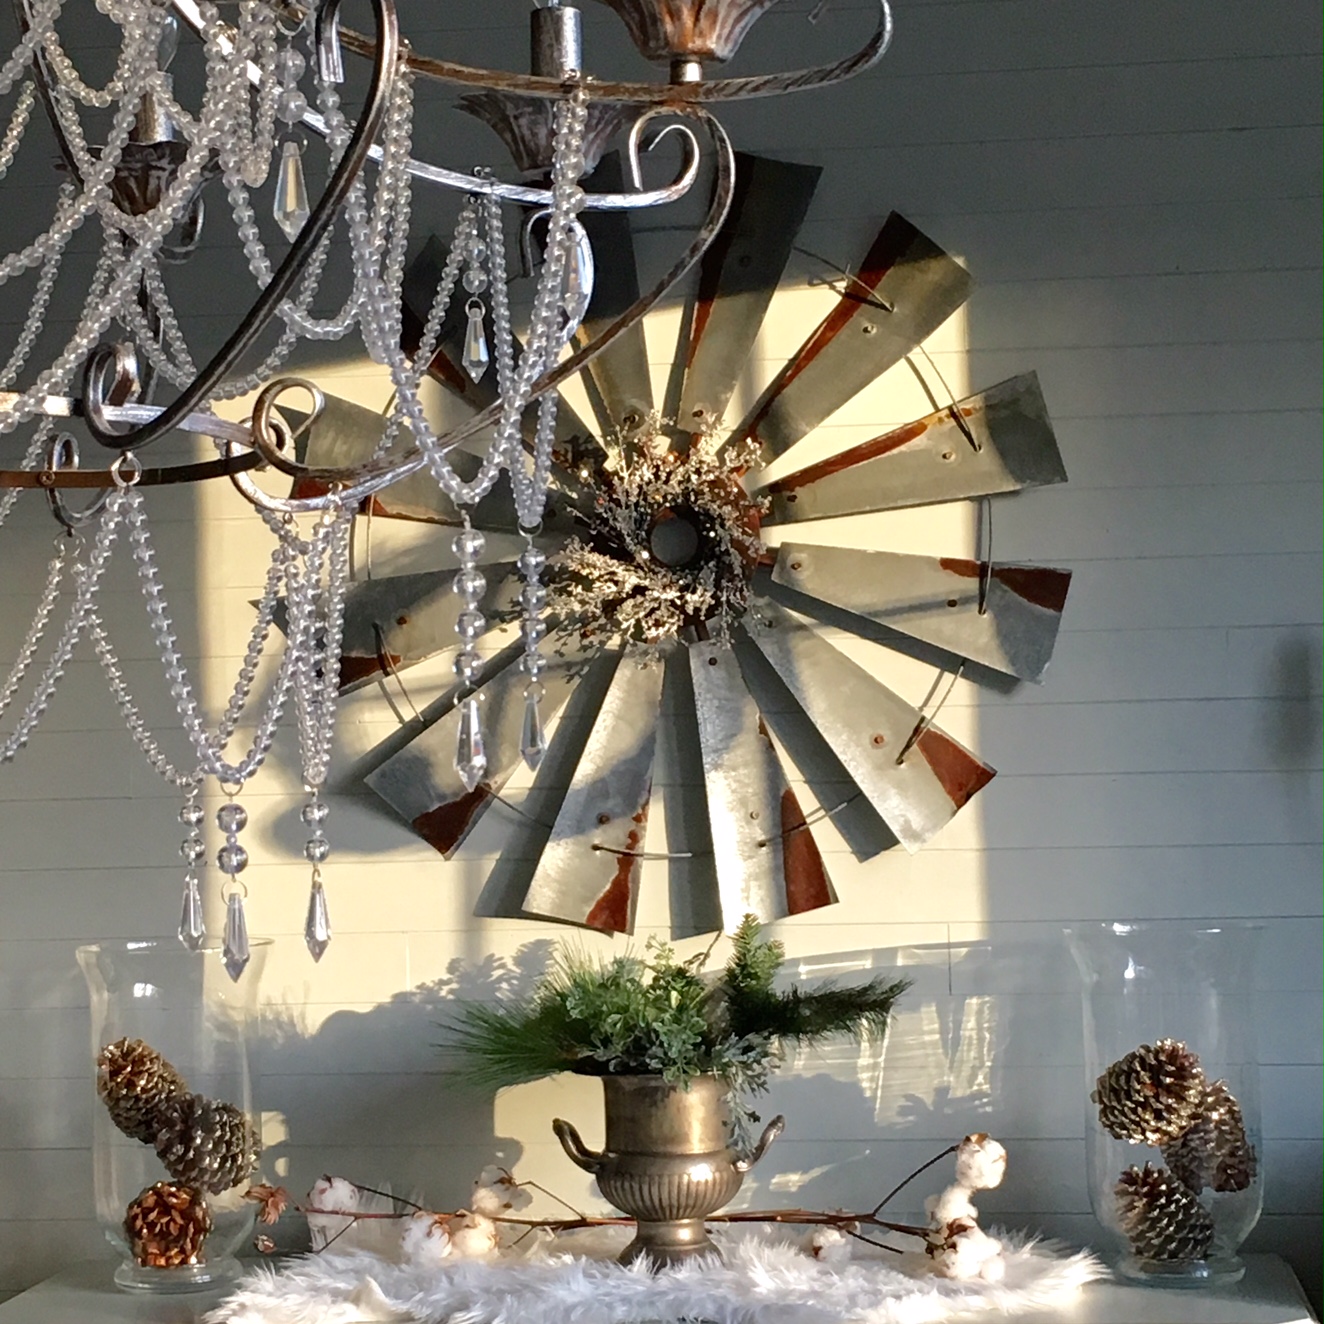
Our first re-do of the dining room buffet looked like this. Those glittery pine cones were half price at TJMaxx and they certainly work for generic winter as well as holiday. In the second photo below, we mixed them with some "au naturel" ones in those large glass hurricanes. The faux fur throw is also from TJMaxx and creates a pretty, snowy look. The throw, the real cotton stems, and the faux greenery add soft texture to an otherwise "hard" vignette. We added a sparkly little crystal wreath to our windmill head too.

© Rhiann Wynn-Nolet

But then we bought a cake stand at HomeGoods and that led to some alternative design inspiration.

© Rhiann Wynn-Nolet
Fairy lights make everything special, don't they? We always look for the ones that have a timer - that way we never have to think about turning them on or off. These lights are a snowflake design.

© Rhiann Wynn-Nolet
Here's our winter dining table. Sorry, didn't have time to do place settings!

© Rhiann Wynn-Nolet
A few days later Rhiann found a great deal on a wood slab at Marshall's and set up a little centerpiece to replace the milk glass compotes. Yes, we know, more pine cones, but aren't they great? These were free! The mercury glass votives cost a couple of bucks a piece at Michael's and we put battery-operated candles in them.

© Rhiann Wynn-Nolet
In our living room cabinet, we kept the mercury glass display "as is".

© Rhiann Wynn-Nolet
In the foyer, we removed the bits of Christmas (glittery deer, red berries, ornaments) and just kept it simple with milk glass and bits of Nature.

© Rhiann Wynn-Nolet
Winter is the perfect season for napping, don't you think?

Daisy and Buster © Rhiann Wynn-Nolet

We also want to let you know about a fun Instagram hashtag we started this past Monday. It's called #MagpieMonday and the idea is to share a photo of whatever you like to collect and display in your home. Each co-host picks a favorite to feature on their feeds. Follow us on Instagram here to learn more and see which IGer's collection was our pick this week! Also, we've just passed the 2k follower mark and we're pretty excited about that too.

© Rhiann Wynn-Nolet

Quince Cottage Style mixes old and new, rustic and opulent.
Our goal is to make our new subdivision house look inviting, beautiful, 
and as though it wasn't born yesterday!
Friday, November 27, 2015

DIY PomPom Twig Wreath

Welcome to Quince Cottage!

Holiday decorating is well underway here and we're hoping to share a few ideas with you this season.
Wreaths are a must at this time of year, right? And pompoms have never been more popular. Why not unite these two in a destined-to-become-classic decoration?
First you need to buy or make a twig wreath. We got ours for $3.99 each at Hobby Lobby.

Twig wreath © Rhiann Wynn-Nolet
You'll also need florist's wire, wire cutters, and craft lights (we got our lights at Michael's), as well as AA batteries for the lights. These lights come in multiple shapes, we chose stars. We like the programmable ones that go on at a designated time and then turn themselves off six hours later.

© Rhiann Wynn-Nolet
We bought a pompom-maker that creates four different sizes.

© Rhiann Wynn-Nolet
Hint 1: to make fluffy pompoms fast, use chunky yarn.

Hint 2: When you tie a piece of yarn around the middle of the in-progress pompom, leave several extra inches hanging loose. This will come in handy later. (See photo below).

For our wreath we used two different yarns and two different sized pompoms. We made three pompoms per wreath.

© Rhiann Wynn-Nolet
Put batteries in the box attached to the lights, then use florist's wire to attach the box to the back of the wreath. Next wrap the lights around the wreath.
Now, tie the pompoms together to make a cluster, and then tie the cluster to the wreath.
Finally, cut a length of ribbon to hang the wreath.

© Rhiann Wynn-Nolet
Here are some photos of the finished wreaths.

© Rhiann Wynn-Nolet

© Rhiann Wynn-Nolet
© Rhiann Wynn-Nolet
© Rhiann Wynn-Nolet

We hope you enjoyed your visit!

Quince Cottage Style mixes old and new, rustic and opulent.
Our goal is to make our new subdivision house look inviting, beautiful, 
and as though it wasn't born yesterday!

Buster and Daisy hope y'all had a Happy Thanksgiving!
They like Thanksgiving because it's all about eating and napping, two of their favorite pastimes.

Buster and Daisy © Rhiann Wynn-Nolet

Friday, August 14, 2015

DIY - Pillow Talk & End o' Summer Decor

Glad to see you here at Quince Cottage!

What's your favorite season? Ours is autumn. Crisp, sunny days, spectacular foliage, pumpkin everything!
It's still August, we know, but with all the stores trotting out their fall goods, who can blame us for wanting to get a head start? It began with an Instagram #mantel challenge. Speaking of Instagram, we'd love you to follow us there.
We're very fond of our mantel and were at risk for committing the sin of "overgramming" it, so we needed to change things up for the challenge. First we did a little home-shopping and then we hit Michael's for some faux-liage to arrange in our milk glass urns. We got those urns at a wonderful consignment shop in Raleigh called Inspirations. If you're in the area, check it out!

Anyway...here's a photo of our summer mantel
Quince Cottage Summer Mantel © Rhiann Wynn-Nolet

And here's one of our late summer-early fall mantel

Quince Cottage Fall Mantel © Rhiann Wynn-Nolet

A couple of close ups...

Fall Mantel Detail Left © Rhiann Wynn-Nolet
Fall Mantel Detail Right © Rhiann Wynn-Nolet

And then the mantel thing led to a pillow thing. Yes, Rhiann doesn't like sewing, but she was fairly pleased with the way her summer porch pillows turned out, and this encouraged her to tackle living room pillows.
Fall says earthy natural colors, nubby textures, homey coziness. With that in mind, we hit WalMart (ticking fabric at about $7 a yard), Mill Outlet Village Fabric in Raleigh (Jacobean floral and wheaty linen, both on clearance for under $7 a yard), and TJMaxx where we found the black and cream striped dishtowels we used for the smaller pillows ($3.99 for two towels).

Here's a closeup of all the fabrics.

Swatches © Rhiann Wynn-Nolet

Something learned during the summer pillow-palooza is that by doing front and back in different fabrics, you can get a lot of different looks using the same collection of pillows.

With four different fabrics, we got four different combinations.

 Quince Cottage Fall Pillows Combo 1 © Rhiann Wynn-Nolet
Quince Cottage Fall Pillows Combo 2 © Rhiann Wynn-Nolet
Quince Cottage Fall Pillows Combo 3 © Rhiann Wynn-Nolet
Quince Cottage Fall Pillows Combo 4 © Rhiann Wynn-Nolet
Which combo do you like best? How do you decorate your home for fall? We'd love to hear!

Quince Cottage Style mixes old and new, rustic and opulent. 
Our goal is to make our new subdivision house look inviting and beautiful,
 and as though it wasn't born yesterday.

Daisy and Buster are ready for some cooler weather, and so are we!
Buster © Rhiann Wynn-Nolet
Daisy © Rhiann Wynn-Nolet