Design. Create. Decorate.

Design. Create. Decorate.

Sunday, May 31, 2015

Porch Project #2 - Table ReDo!

Welcome to Quince Cottage! As promised, here's our follow up post to Porch Project #1. Our last porch wasn't big enough for a dining table, but the one we had in Maine was and we've really missed summer meals in the semi-outdoors. That table from Maine was sitting right in our garage, taking up much-needed storage space. The solution was obvious.

We didn't want to spend a lot of time and effort (we've got TONS of projects happening) rehabbing the table; therefore, this redo was quick and pretty easy. Once we removed the oil cloth cover and fixed the not-quite-broken leg (courtesy of Daughter #1), it was time to decide on a "look".

Thanks to the pillow project, our porch has a lovely, nostalgic, shabby chic but not too sweet, vibe. A fresh paint job with a simple stripe seemed just right.

We stuck with two paint colors we've been using on other DIY projects: Milk Paint and Scandinavian Sky, both by Olympic Paint purchased at Lowes. Tip: those little tester jars are great for small projects like this!

© Rhiann Wynn-Nolet

Milk Paint

Scandinavian Sky

In addition to the paint, all Ron needed was one 2" paint brush, one artist's paint brush, painters' tape, a ruler or yardstick (metal is ideal), an X-Acto knife and a can of clear coat finish. We used Minwax Polycrylic water-based eurethane.

Since we wanted the table to have a slightly worn, but not heavily distressed, appearance, Ron applied a thin coat of the Milk Paint. You can see the brush strokes clearly.


Next he measured carefully and taped off the placement of the stripes. This is where the X-Acto knife and straight edge came in (cutting the painters' tape to make a thinner stripe).


Once the pattern was laid out...


Ron brushed the Scandinavian Sky on, first going the length of the stripe, then applying a second light coat brushing in the opposite direction. This makes it look "almost" like fabric, like say an old dishcloth or grain sack?


When the paint was THOROUGHLY dry, he removed the tape, and applied clear coat to make the finish last longer and help protect against mold and mildew.
We're pleased with the finished product!

© Rhiann Wynn-Nolet

And here's the first dinner we had on our "new" table. Dining al fresco, in the shade, without bugs.

© Rhiann Wynn-Nolet
Porch life is wonderful, don't you think? Here's Buster, checking out the paint job (well, that's what he said he was doing, I suppose he could have been checking to see what was for dinner...)

©Rhiann Wynn-Nolet
Thanks for stopping by Quince Cottage! We've got plenty more DIY projects, recipes, gardening stories, and design ideas for you. We might even throw in some real estate tips for those looking to buy or sell a home.

Wednesday, May 27, 2015

Summertime, and the Living is Peachy...

Alright, technically it isn't quite summer, but we've had enough hot days at Quince Cottage to make it feel like summer. Strolling past the luscious fruits and veggies at the Raleigh Farmers' Market, it's impossible not to be inspired to make ALL THE YUMMY THINGS.

State Farmers Market Raleigh © Rhiann Wynn-Nolet
In a couple of weeks we're having company,which creates the perfect excuse to test-drive some recipes. There's nothing worse than seeing something that looks mouthwateringly delicious on Pinterest, making it, then having the result be worthy of one of those Pinterest Fails on Tumblr. Here's a recipe we thought looked tasty from cookingclassy(dot)com. We're glad we made it first, because the spice level was pretty overwhelming. Like eating pot pourri. It was hard to even taste those peaches I spent so much time peeling, pitting, and slicing... We also thought it could benefit from a bit of brown sugar.
So, we reformulated with fantastic results. Now we can share it with you! Now, of course, if you love heavy autumnal spices, by all means take a look at the original recipe.

Peach Bar Ingredients © Rhiann Wynn-Nolet
Except we decided to eliminate nutmeg in our second attempt and were glad we did. 
Ron noticed afterward that I'd forgotten to include the egg, so here you go.

Egg © Rhiann Wynn-Nolet

We always had brown eggs in New England-down here in North Carolina they're considered kind of exotic I guess (judging by price and availability).

Ingredients
4 1/2 C peaches (about 10 peaches, firm but ripe, peeled, pitted, diced)
1 3/4 C white sugar, divided
3 1/2 TBS cornstarch
1/3 C brown sugar
1/4 tsp cinnamon
pinch of ground ginger
2 TBS orange juice
1 tsp orange zest
3 C all-purpose flour
1 tsp baking powder
1/2 tsp salt
3/4 C salted butter, cold and divided into cubes
1 large egg
1/4 C sour cream
1 1/2 tsp vanilla extract

Directions
1. Preheat oven to 375 degrees and grease a 13 x 9 inch baking pan
2. In small bowl, whisk together 3/4 white sugar, cornstarch, cinnamon, and ginger
3. In large bowl, toss peaches with orange juice and zest. Sprinkle sugar mixture over peaches and toss to coat. Set aside.
4. In another large bowl, whisk together flour, baking powder, and salt. Cut butter into flour mixture with fork or pastry blender until it forms coarse crumbs.
5. In another small bowl whisk together egg, sour cream, and vanilla. Pour egg mixture into flour mixture and stir to combine. Add remaining 1 C white sugar and brown sugar, stir to combine.
6. Spread and press half of crumb mixture into bottom of pan. Toss peach mixture once more and pour over crumb layer, spread to cover evenly. Sprinkle remaining crumb mixture on top in an even layer.
7. Bake 45-50 minutes (until golden).
8. Serve warm with vanilla ice cream or allow to cool and cut into bars. Store in airtight container in refrigerator.

© Rhiann Wynn-Nolet

And now, what y'all have been waiting for...

© Rhiann Wynn-Nolet

Here, have a bite!


© Rhiann Wynn-Nolet


Now, there's absolutely no reason why you couldn't make this recipe using other seasonal fruits. At Quince Cottage we love recipes that are simple, tasty, and customizable. We might try this with berries, apples, or pineapple. And if you don't have time to make a fruit filling, canned pie filling would definitely work.

Come back and see us again - we'll be sharing Porch Project #2!

Saturday, May 23, 2015

Porch Project #1 Pillows!

Quince Cottage Confession No. 1
We get bored easily. This keeps us in a more or less perpetual state of changing our decor, or at least wanting to. Our house in Maine was a Craftsman-inspired cottage and we decorated the porch accordingly in terms of color: earthy greens and reds with cream and brown. See the photos below.

Our Kennebunkport house © Rhiann Wynn-Nolet
Screen Porch © Rhiann Wynn-Nolet
Those pillows on the floor functioned as dog beds :)

When we moved to North Carolina, we ended up in a Craftsman-inspired home once again, and once again, the color scheme of the exterior was "earthy". Sorry about not sharing a photo of the screen porch there, but we never got around to taking pictures before moving out.

Our first home in North Carolina © Rhiann Wynn-Nolet
Fast forward to Quince Cottage, the place we now call home. Boy, were we ready for a change! We went in pretty much the complete opposite direction with a creamy exterior accented with soft blue and white.

Quince Cottage © Rhiann Wynn-Nolet
Now, I don't know if you've ever purchased new pillows for a Lloyd Flanders sofa, but let me tell you, they're not cheap. Moreover, there was nothing actually wrong with our cushions, aside from their fabric covering, so the obvious solution was to recover them (along with the existing toss pillows).

Quince Cottage Confession No. 2
I loathe, loathe, loathe sewing, and I'm really not very good at it. As a result, I did the simple toss pillow covers weeks before I finally tackled the more complicated box pillow covers. In fact, I'm so "not good" at sewing that this post is NOT in any way a tutorial/DIY thing.
Here are my only tips: announce a disclaimer before you even start (as in, "these covers are going to be FAR from perfect, in fact they might look somewhat sucky"), second, do your best to hide the really ugly stuff in the back of the pillow (like how you deal with fasteners etc.), and finally, throws can hide a goof-up under the pretense of providing coziness on a chilly evening. I'm still looking for a pretty throw to cover up that pillow cover on the far left of the sofa, where the stripes didn't line up and the seam puckered...
But, without further ado, here are some photos, and you'll notice we used two different fabrics on some pillows. Two looks for the price (and work) of one!
Look #1 © Rhiann Wynn-Nolet

Look #2 © Rhiann Wynn-Nolet
And here's the sofa, those two large pillows (yep, they're bed pillows) in the middle can each be reversed so you can have two navy blue, two rose, or one of each.

© Rhiann Wynn-Nolet

We found the floral fabrics on the "leftovers" table and in the clearance section at The Mill Outlet Village in Raleigh. They have fabulous stuff there, AND they're really nice. The striped fabric we found on clearance at Ballard's Designs online.
Oh, one more thing, if you're not using Sunbrella material, then take the extra step of spraying on Scotchgard™ water-repellent to help stave off mold and mildew when the weather gets hot and humid as it does around here. If you live in Arizona or some place like that, you can probably skip it.

© Rhiann Wynn-Nolet

Be sure to spray it on outdoors and not near any surfaces that shouldn't be made water-repellent. Why yes, that is a different sofa - you're so observant! That's the one on our front porch and we'll be talking more about that one in an upcoming post about curb appeal.

Happy Memorial Day to all of you! We hope you get to spend some time taking it easy this weekend, like Buster here. We all love porch life here at Quince Cottage.

Buster © Rhiann Wynn-Nolet

Sunday, May 17, 2015

Pineapple Fried Rice Is Nice! And Easy!

Welcome! Watch your step around that big old hole by the front door, it's part of a gardening project we'll be blogging about later on...

© Rhiann Wynn-Nolet

In fact, we've had LOTS of projects happening here at Quince Cottage which has resulted in quite a few nights of Lean Cuisine and take-out food. But there are times when you see something on Pinterest and it looks fast and simple and tasty. Pineapple Fried Rice, for example. The original recipe is on damndelicious(dot)net. We paired it with Tai Pei frozen egg rolls.

PINEAPPLE FRIED RICE RECIPE:

Pineapple Rice and Eggroll © Rhiann Wynn-Nolet
© Rhiann Wynn-Nolet

Ingredients
1/2 C diced ham (we love the Honey Ham at Food Lion)
2 carrots, diced (we actually used about 1/3 C pre-shredded carrot, super-convenient)
1/2 C frozen corn
1/3 C edamame (yes, we used peas, per the original recipe, but edamame would be better)
1 tsp minced roasted garlic (keep a jar of this in your fridge for when you just need a little garlic)
1/2 tsp grated ginger (the original called for ginger powder but using real makes a big flavor difference and you can store ginger root in the freezer)
1/2 large sweet onion, chopped
2 C drained pineapple chunks (fresh would be great if you have the time)
3 C cooked rice (we use brown rice whenever possible)
2 TBS olive oil
1 TBS sesame oil (this imparts a nice Asian flavor)
3 TBS low sodium soy sauce
white pepper to taste
Sriracha, if that's how you roll

Directions
1. Whisk soy sauce, sesame oil, garlic, and ginger together in small bowl. Set aside.
2. Heat olive oil in skillet, saute onion until translucent. 
3. Stir in carrots, corn, edamame and cook 3-4 minutes.
4. Stir in ham, rice, pineapple, and soy sauce mixture. Heat through. BOOM! Serve.

Like many of our favorite Quince Cottage recipes, this one is 

easy, yummy, and customizable. 

There's no reason at all why you couldn't substitute or add water chestnuts, some shredded bok choy, pea pods, shrimp, or whatever floats your boat.


Monday, May 11, 2015

A Modern Spin on Canopies and Testers

Princesses ALWAYS have canopy beds, and Rhiann desperately wanted one when she was a little girl. Years later, she still craves luxury and style, but with a more practical, modern twist.

We did this bed curtain treatment in our previous house, and it looked good. With the deeper, woodsier wall color in the Quince Cottage master, the result is fabulous!
Thanks, Capitol City Homes for letting us pick whatever color we wanted for our bedroom! FYI, this is Sherwin Williams High Tea.

If you're considering doing bed curtains like these...

Here's what you'll need:
Fabric (to get the necessary fullness we used two 54" wide lengths for the back curtain and stitched them together, and we used three 54" wide lengths for the front curtain). Make sure you buy enough to allow for hems at the bottom and turnovers at the top.
Trim for the bottom of the front curtain, if desired.

We got both fabric and trim in Goldsboro, NC at The Cloth Barn which has TONS of fabric and gorgeous trims at discount prices. 
Two curtain rods. We had to order the one with longer side pieces online, but it was very reasonably priced. Graber makes these and you want one that extends about 3-4".


Studfinder
Screws and wall anchors (because if you're not lucky enough to hit studs, you'll need anchors)


Starter nail
Hammer
Screwdriver
Screw hook
Tape Measure
Level (you'll need this only if you're not hanging at ceiling or crown molding level)
Ladder
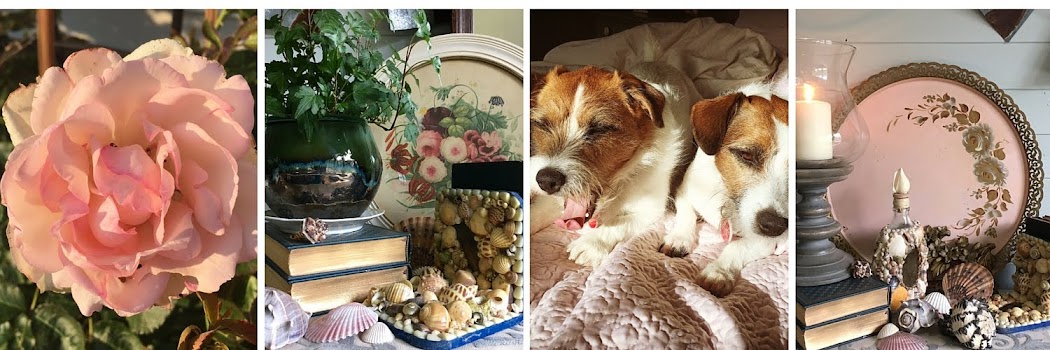
Dogs. Well, you don't actually NEED them, but just try doing any project without them... Terriers make everything more fun, right?

Buster & Daisy © Rhiann Wynn-Nolet

How To:
Careful measuring is key to successful installation. Fortunately, Ron's a Virgo, so he's a natural when it comes to precision. For our particular space, we needed the middle of the rods to line up with the chandelier. The tray ceiling made this a bit more challenging, but we measured the wall opposite the bed, then measured the same length on the bed wall and marked the center of that.
Next we measured the width of the bed. Because we wanted the curtains to show slightly beyond the edges of the headboard, we added two inches to each side when we measured out from the middle to where the first rod bracket would be installed.
Hopefully that makes sense. Writing this reminds me of a grade school assignment titled "Instructions For Tying Shoelaces".
Ron installed the rod for the back curtain first, using wall anchors to make sure the weight of the fabric would be fully supported. It's easier to use wall anchors if you use a nail to make a starter hole and widen it a bit by wiggling the nail around.


Next he put a screw-in hook in the center for even more support, so the curtain wouldn't sag.


(Yes, dark paint does scuff easily. In this case those marks will be hidden by the curtains, so no biggie).
Then he hung the first curtain, and installed the second rod's brackets about 2" out on either side.


Done! Doesn't it look great?

Bedroom © Rhiann Wynn-Nolet


Bed Curtains © Rhiann Wynn-Nolet
Unfortunately the bedding colors are a bit off in these photos. The sheets are Ralph (found at HomeGoods) and have little cream-colored polka dots, and the quilt isn't nearly as sage-y, it's more of a willow or spring green. Here's a closeup, at least you can see the dots, and the quilt color is better, but not 100% accurate. Sigh.


Here's a macro of the ball trim. Adorable, isn't it?


Daisy found this whole project boring and dozed off in the middle of everything.


At Quince Cottage we like to get a lot of "look" without spending a lot of money. We both love fern motifs and this fabric was the key to everything else in the room in terms of color. Lying in bed, it's easy to imagine we're in a cool forest glade (minus the bugs and snakes).

Thank you for visiting! We hope you'll stop by Quince Cottage again soon. Future topics include: what to do when your curtains are too short, a special door for our office, and a recipe for pineapple rice.

Sunday, May 10, 2015

OoeyGooeyGoodness aka Turtle Bars

Here at Quince Cottage, we frequently find culinary inspiration on Pinterest, or sometimes on cooking shows. This recipe was part of a cookie swap at KitchenEtc. a cooking/dining store Rhiann worked at ages ago. The store has since gone out of business, but the recipes live on!

Here's what's to love: a handful of ingredients, easy to make (honestly the hardest thing is unwrapping all those caramels), and decadently delicious.

© Rhiann Wynn-Nolet
 
We brought some over to our neighbors Greg and Penny, and Penny was pretty sure Greg would abandon his gluten-free lifestyle for a taste of these.

Ooey Gooey Turtle Bars Recipe

Ingredients:
14 oz. caramels (we had to buy 2 bags since 1 bag had only 11 oz.)
1/3 + 1/2 C evaporated milk
12 oz. semi-sweet chocolate chips
3/4 C butter
1 pkg. (18 oz. or so) German chocolate cake mix
1 C chopped pecans

Directions:
1. Melt caramels and 1/3 C of the milk together in top part of double boiler, stirring often
2. Combine cake mix, softened butter, and 1/2 C evaporated milk in a bowl until mix holds together. Stir in pecans, then press in bottom of greased 13 x 9 baking pan
3. Bake cake mixture for 6 minutes in 350 degrees
4. Remove pan from oven and sprinkle chocolate chips over the top.
5. Pour melted caramel mixture over the cake mixture.
6. Spread remaining cake mix over the top and bake 15-18 minutes.
7. Let cool before cutting to serve.

And here they are! They taste just as fabulous as they look.

Ooey Gooey Turtle Bars © Rhiann Wynn-Nolet
You want to get closer, don't you? Okay.

Ooey Gooey Turtle Bars © Rhiann Wynn-Nolet

Happy Mother's Day for those of you celebrating. May you spend it in a beautiful place, surrounded by love and good food!

Stop by Quince Cottage for our upcoming posts on terrier-proofing a backyard, curtainless window treatments, and more good stuff!

Sunday, May 3, 2015

Very Berry Oatmeal Cookies

Welcome, or welcome back! Sorry for the month-long silence, but it's been a very busy few weeks of packing, moving, unpacking, cleaning, and parenting. Oh, and some decorating projects have happened here at Quince Cottage as well, but more about those in future posts.

We love our new kitchen and one of the first things we baked in it was a batch of these cookies. They are yummy and easy and if you don't happen to have the same kind of nuts or dried fruit on hand, go ahead and change them up.

Very Berry Oatmeal Cookies © Rhiann Wynn-Nolet

Berry Berry Oatmeal Cookies Recipe
Makes 18 cookies

Ingredients
1/2 C butter
1/2 C sugar
1/2 C brown sugar
1 egg
1 tsp vanilla
1 C flour
1/2 tsp baking soda
1/2 tsp baking powder
1/4 tsp salt
1/2 C quick oats
1/2 C mixed dried berries (cranberries, cherries, blueberries)
1/4 C pecans

Directions
1. Preheat oven to 350 degrees
2. Cream butter and sugar together, add in egg and vanilla
3. Stir flour, baking soda, baking powder, salt and oats together. Add to creamed mixture.
4. Stir in berries and pecans
5. Drop by rounded tablespoons onto parchment lined cookie sheet
6. Bake 11-13 minutes. Cool on sheet 1 minute, then remove to wire cooling rack.

Thank you for stopping by! 
Here are some things we'll be talking about in upcoming posts: preparing a house for sale, moving with pets, window treatments, and fried rice (designers have to eat too!)